For homeowners seeking a roofing material that combines timeless beauty with natural durability, wood shake roofing is an excellent choice. Its rustic appearance and long lifespan make it a popular option for enhancing curb appeal while providing dependable protection from the elements. Before starting a roofing project, however, it’s important to understand the wood shake installation process so you know what to expect from start to finish.
Understanding the wood shake installation process helps homeowners prepare for their roofing project and make informed decisions that protect their investment.
Why Choose Wood Shake Roofing?
Wood shake roofing offers a combination of beauty, durability, and natural insulation.
Homeowners often choose wood shake roofs because they provide:
- Distinctive curb appeal
• Excellent insulation properties
• Long-lasting performance
• Natural wood aesthetics
• Increased home value
• Strong weather resistance
The wood shake installation process ensures these benefits are fully realized through proper installation techniques.
Initial Roof Inspection
Every successful roofing project begins with a detailed inspection.
Before starting the wood shake installation process, professional contractors evaluate:
- Roof size
• Roof pitch
• Structural condition
• Existing roofing materials
• Attic ventilation
• Drainage systems
This inspection helps identify any repairs needed before installation begins.
Choosing the Right Wood Shake Material
Selecting quality materials is a critical part of the wood shake installation process.
Homeowners may choose from:
- Western red cedar
• Alaskan yellow cedar
• Premium-grade cedar shakes
• Pressure-treated wood shakes
The material selected affects durability, appearance, maintenance, and overall roof lifespan.
Removing the Existing Roof
If replacing an old roof, contractors first remove the existing roofing materials.
During this stage of the wood shake installation process, crews will:
- Remove shingles or previous roofing materials
• Dispose of debris safely
• Expose the roof decking
• Prepare the surface for inspection
Complete removal allows contractors to identify hidden structural issues before new materials are installed.
Inspecting and Repairing Roof Decking
Once the old roof is removed, the roof deck is carefully inspected.
An important part of the wood shake installation process includes checking for:
- Water damage
• Wood rot
• Loose sheathing
• Structural weaknesses
Damaged decking should be repaired or replaced to provide a solid foundation for the new roof.
Installing Underlayment
Underlayment serves as a secondary moisture barrier beneath the wood shakes.
During the wood shake installation process, contractors install:
- Synthetic underlayment
• Ice and water shield
• Moisture protection membranes
These materials help protect the home from leaks caused by wind-driven rain and melting snow.
Installing Flashing
Proper flashing installation is essential for preventing water intrusion.
The wood shake installation process includes installing flashing around:
- Chimneys
• Skylights
• Roof valleys
• Plumbing vents
• Roof-to-wall transitions
High-quality flashing protects the most vulnerable areas of the roof.
Installing the Wood Shakes
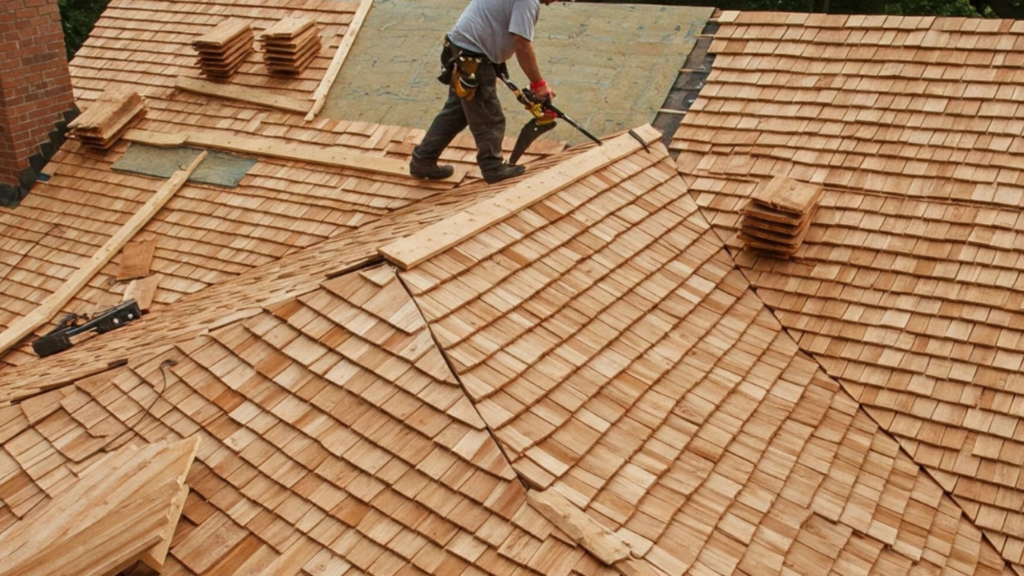
The installation of cedar shakes is the centerpiece of the wood shake installation process.
Professional installers carefully position each shake to ensure:
- Proper spacing
• Correct overlap
• Secure fastening
• Consistent alignment
Proper installation promotes drainage, ventilation, and long-term roof performance.
Step 8: Ensuring Proper Roof Ventilation
Ventilation is critical for extending the life of a wood shake roof.
As part of the wood shake installation process, contractors verify:
- Adequate attic airflow
• Ridge vent performance
• Soffit ventilation
• Moisture control
Balanced ventilation helps reduce heat buildup and prevents moisture-related damage.
Final Inspection and Cleanup
Before the project is completed, contractors perform a comprehensive inspection.
The final stage of the wood shake installation process includes:
- Checking installation quality
• Inspecting flashing
• Confirming proper alignment
• Cleaning debris from the property
• Removing nails and construction materials
A final walkthrough ensures the roof meets quality standards before project completion.
Typical Installation Timeline
Many homeowners wonder how long the wood shake installation process takes.
While every project is different, the timeline often includes:
- Day 1: Roof preparation and tear-off
• Day 2: Deck inspection and repairs
• Day 3: Underlayment and flashing installation
• Days 4–6: Wood shake installation
• Final day: Inspection and cleanup
Project length depends on weather, roof size, complexity, and any structural repairs that become necessary.
Factors That Can Affect the Timeline
Several variables may extend or shorten the wood shake installation process.
These include:
- Roof size
• Roof pitch
• Weather conditions
• Material availability
• Structural repairs
• Number of roof features
Working with an experienced contractor helps minimize unnecessary delays.
Maintenance After Installation
Proper maintenance helps preserve the results of the wood shake installation process.
Homeowners should:
- Schedule annual roof inspections
• Remove leaves and debris
• Clean gutters regularly
• Trim overhanging tree branches
• Address damaged shakes promptly
Routine maintenance helps maximize roof lifespan and maintain curb appeal.
Common Installation Mistakes to Avoid
Professional installation is essential because mistakes during the wood shake installation process can reduce roof performance.
Common mistakes include:
- Improper shake spacing
• Inadequate ventilation
• Incorrect fastener placement
• Poor flashing installation
• Skipping underlayment
Hiring experienced roofing professionals helps avoid these costly issues.
Benefits of Professional Installation
Professional contractors bring valuable expertise to every roofing project.
Experienced installers help ensure the wood shake installation process delivers:
- Superior craftsmanship
• Improved weather protection
• Longer roof lifespan
• Proper code compliance
• Manufacturer warranty eligibility
Quality workmanship protects both the roof and the homeowner’s investment.
Why Choose Kerrigan Roofing and Restoration
Homeowners trust Kerrigan Roofing and Restoration for expert roofing services throughout Central Ohio.
We provide:
- Comprehensive roof inspections
• Professional wood shake roof installation
• Premium roofing materials
• Skilled craftsmanship
• Honest communication
• Reliable warranties and customer support
Our experienced team carefully manages every stage of the wood shake installation process, ensuring your new roof delivers lasting beauty, durability, and protection.
Final Thoughts
A wood shake roof offers exceptional curb appeal, natural insulation, and long-lasting performance when installed correctly. Understanding the wood shake installation process helps homeowners know what to expect, from the initial inspection through the final cleanup.
By choosing quality materials, maintaining proper ventilation, and working with experienced roofing professionals, homeowners can enjoy a beautiful roof that protects their home for decades.

SCHEDULE APPOINTMENT
"(Required)" indicates required fields