")
When it’s time for a new roof, homeowners often wonder what exactly happens during the project. At Kerrigan Roofing and Restoration, we believe that understanding the roof installation process helps homeowners feel confident and prepared. A new roof isn’t just an upgrade—it’s an investment in your home’s protection, appearance, and value.
From the first inspection to the final cleanup, every step of the roof installation process matters. In this guide, we’ll walk you through what to expect, how to prepare, and why working with experienced professionals ensures a smooth experience.
Understanding the Roof Installation Process
The roof installation process involves more than just replacing old shingles. It’s a detailed procedure that includes removing existing materials, inspecting the structure beneath, and installing a complete roofing system designed to last for decades.
Each home is different, but the goal remains the same: to provide strong, watertight coverage that stands up to wind, rain, and temperature changes. Kerrigan Roofing and Restoration follows proven industry standards for safety, quality, and precision to ensure your roof performs at its best.
Step 1: Initial Roof Inspection and Estimate
The first step in the roof installation process is a detailed inspection. Our team evaluates the condition of your current roof, identifying damage, leaks, or signs of wear. We look at everything from shingle quality and flashing condition to ventilation and structural integrity.
Once we complete the inspection, we’ll provide a clear, itemized estimate outlining materials, labor, and the project timeline. Transparency at this stage helps you plan your budget and understand the full scope of the installation.
Step 2: Selecting Roofing Materials
Next comes one of the most exciting parts of the roof installation process—choosing your materials. You can select from a variety of options, including:
- Asphalt shingles – Affordable and versatile, available in many colors and styles.
- Metal roofing – Long-lasting and energy-efficient.
- Tile or slate – Elegant and highly durable for premium homes.
We’ll guide you through the pros and cons of each material based on your home’s architecture, budget, and local climate. Choosing the right material ensures your new roof not only looks great but performs exceptionally well for years.
Step 3: Preparing for the Installation
Before the actual work begins, proper preparation makes a huge difference. During this phase of the roof installation process, our crew will:
- Secure necessary permits
- Order and stage materials for easy access
- Protect your landscaping and exterior features with tarps or boards
- Set up safety equipment around your property
We also recommend homeowners move vehicles, cover attic items, and remove fragile wall decorations since some vibration may occur during installation. This preparation ensures a safe, efficient job site and protects your property from accidental damage.
Step 4: Removing the Old Roof
Tear-off is one of the most critical steps in the roof installation process. Our team removes old shingles, underlayment, nails, and flashing to expose the decking underneath. This allows us to inspect the wooden base for any signs of rot or damage.
If any decking needs replacement, we handle it immediately before proceeding. Skipping this step could shorten the lifespan of your new roof, which is why Kerrigan Roofing and Restoration never installs new materials over old ones.
Step 5: Roof Deck Inspection and Repairs
Once the old materials are removed, we thoroughly inspect the roof deck. During this phase of the roof installation process, we check for weak spots, water damage, or structural issues. If any boards are soft or deteriorated, we replace them to create a solid foundation for your new roof.
This ensures that the installation adheres properly and maintains long-term durability.
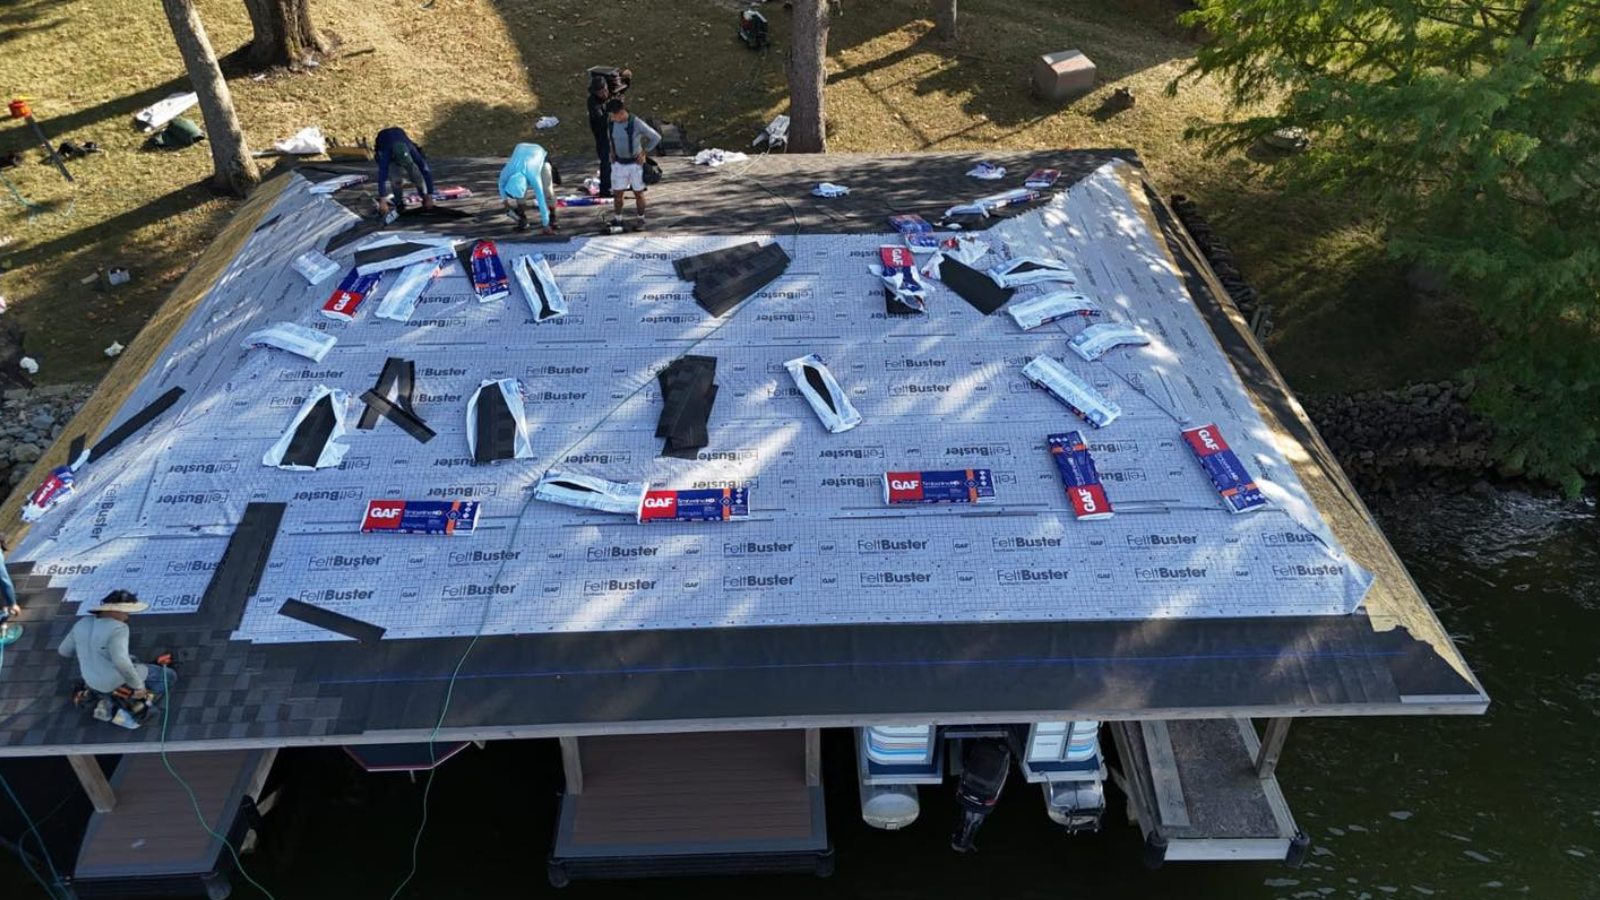
Step 6: Installing Underlayment and Flashing
Next, we begin adding protective layers. The underlayment—typically a water-resistant or waterproof barrier—is installed directly over the decking. It prevents moisture from penetrating the roof during heavy rain or snow.
Flashing is installed around chimneys, skylights, vents, and valleys to direct water away from vulnerable areas. This step in the roof installation process is crucial for leak prevention and overall water management.
Step 7: Laying the Roofing Material
Once the foundation layers are complete, we start installing your chosen roofing material. Each product requires specific techniques to ensure proper alignment and sealing.
For example, asphalt shingles are nailed in overlapping rows, while metal panels are secured with concealed fasteners. Every detail matters during this part of the roof installation process—from spacing and ventilation gaps to the final ridge cap placement.
Step 8: Ventilation and Insulation Checks
Proper ventilation is an often-overlooked step in the roof installation process but plays a vital role in extending your roof’s lifespan. Our team evaluates your attic ventilation to ensure air flows freely, reducing heat buildup and preventing moisture problems.
Balanced ventilation keeps energy bills lower and prevents issues like mold, ice dams, or premature shingle wear.
Step 9: Final Inspection and Cleanup
After installation, Kerrigan Roofing and Restoration performs a comprehensive inspection to confirm every aspect of the roof installation process meets our quality standards. We double-check flashing, sealants, shingle alignment, and ventilation systems.
Then, we clean up thoroughly—removing debris, stray nails, and leftover materials from your property. We treat your home as if it were our own, ensuring everything is left spotless.
Step 10: Post-Installation Review and Warranty
The last phase of the roof installation process involves reviewing the completed project with the homeowner. We’ll walk you through the new roof, answer questions, and explain your warranty coverage. Kerrigan Roofing and Restoration provides both manufacturer warranties on materials and our own workmanship guarantee for added peace of mind.
We also share maintenance tips, such as scheduling annual inspections and keeping gutters clear, to help you protect your new roof for years to come.
How Long Does the Roof Installation Process Take?
The duration of the roof installation process depends on several factors, including roof size, material type, weather, and complexity. Most residential projects take one to three days to complete.
Before work begins, our team provides a clear timeline so you know exactly what to expect. We also communicate regularly throughout the project to keep you updated on progress.
How Homeowners Can Prepare
Homeowners can take a few simple steps to make the roof installation process go smoothly:
- Move outdoor furniture, plants, or decorations away from the house.
- Keep children and pets indoors or away from the work area.
- Cover belongings in the attic to protect from dust or debris.
- Ensure driveways are clear for material delivery and dumpster access.
By preparing ahead of time, you help the installation team work efficiently while keeping your property safe.
Why Choose Kerrigan Roofing and Restoration
A quality roof begins with an expert installer. The roof installation process we follow is built on years of experience, precision craftsmanship, and commitment to customer satisfaction. Our team uses top-grade materials and proven techniques to ensure your home receives lasting protection.
When you work with Kerrigan Roofing and Restoration, you’re choosing a company that values integrity, communication, and excellence from start to finish.
Final Thoughts
Understanding the roof installation process allows you to make informed decisions and feel confident in your investment. Every phase—from inspection to cleanup—plays an essential role in creating a roof that protects your home and enhances its curb appeal.
At Kerrigan Roofing and Restoration, we’re here to make the experience simple, transparent, and stress-free. Contact us today to schedule your consultation and learn more about how our professional roof installation process can give your home the durability and beauty it deserves.
SCHEDULE APPOINTMENT
"(Required)" indicates required fields